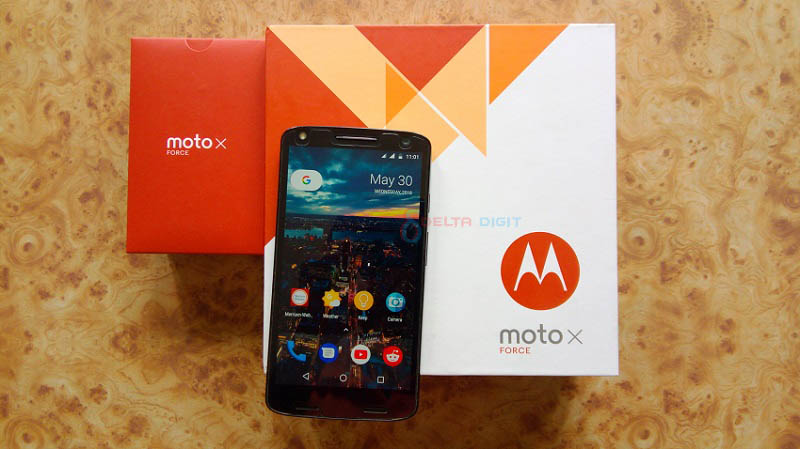
We have a Motorola Moto X Force with us bought from India. The model is XT1580 and in the USA it is also known as Droid Turbo 2. There are lots of articles everywhere about custom ROM benefits and rooting. We found lots of videos on YouTube and other sites but many of them were confusing. There are lots of threads in XDA developers and with the help of those posts and expert advice, we are covering this article.
This post contains all the details on the process of unlocking the Bootloader of Moto X Force, installing TWRP, flashing custom ROM on Moto X Force, rooting, and flashing the stock firmware. We also have a video showing proof of a new ROM and root with dual SIM working.
It is good to see that developers were able to give simultaneous dual sim support. We always do such experiments with our devices and learn a lot. Last time it was our AllWinner Tablet unbricking experiment. This work of modifying a mobile is a bit scary for beginners. Please read this article very carefully and let us state that only you are responsible for any harm that occurs to your device. Be very careful before performing this work and make sure you have a full backup of all your data.
Also Read: Motorola Mobile Price in Nepal
Background Preparation
Motorola allows unlocking the bootloader very easily. To root, flash custom ROM, or install TWRP you need to unlock the bootloader first. Follow these steps to get your unlock code from the site but before that install ADB on your computer with fastboot. We will be teaching every step from first because we know the problems that arise due to less information. Go to the Google Android Site download platform tools and extract the folder and put it inside C: Drive in a new folder named “adb”. You can place the folder in another location as well but this is for ease.
Unlocking the Moto X Force Bootloader
- Enable Developer Options on your phone by tapping on Build Number in your settings. Then enable USB Debugging and OEM unlocking in the settings.
- Read the instructions from Motorola’s site, and download the latest USB Drivers.
- The method of getting your unlock code is given on the company’s website given above. Copy the code in a safe location and save it. If you are confused about how to open adb console then just open Command in your PC and type:
cd..cd..cd adbcd sdkcd platform-toolsadb
- Put your phone in the fastboot mode again and connect to your PC and open adb by the above-mentioned process. Now type:
fastboot devices (See for a response)fastboot oem unlock UNLOCK CODE
- The Unlock Code is the one you got from Motorola. They send it by email as well when requested. After this, your phone will always show a message that your phone is unlocked. Now you can continue to do other work you like.
Installing TWRP
TeamWin Recovery Project is the most popular custom recovery in the Android world. Please follow the below-mentioned steps for flashing TWRP to your phone. Do not ever attempt to flash a custom ROM without having a custom recovery and make a backup before proceeding. This process also includes steps to create a backup using TWRP and resorting to it.
- Download the TWRP image (http://bit.ly/2GZlcBO) and name it twrp.img.
- Copy this file to your adb folder and inside the platform-tools folder.
- Open adb console as mentioned in the third step on the unlocking process and put your phone in fastboot mode. You can do this just after unlocking the bootloader as well.
- Type the command:
fastboot flash recovery twrp.img - Be very careful after this and DO NOT START or REBOOT. Directly go to RECOVERY from your fastboot screen on your phone.
- We recommend that you create a backup and keep it in your Memory card by selecting storage while creating the backup. Create a backup of Boot, System, and Data.
- Turn off your phone from the interface and open it again.
Flashing Custom ROM on Moto X Force
We learned all these just to flash a new Motorola Moto X Force Custom ROM to improve battery and enable Camera 2 API. These detailed steps were followed to flash ROM named “Moto X Force L!te” which is available on the XDA Developers site. This is stock firmware with lots of additional features, new changes, and removed bloatware. The best thing is that now Moto X Force supports two SIM cards at the same time with 4G in primary and 3G in secondary. In stock ROM only one SIM works even though it has two SIM slots. The below-mentioned rooting process works for this ROM and we don’t guarantee that will work for other ROMs.
- Go to XDA Developers Moto X Force L!te Thread and download any firmware you like. We recommend the Extended version because we have tested it and it is better with lots of improvements.
- Copy the files to your memory card and open recovery by restarting your phone.
- Now Go to Wipe and clear the System, Data, Cache, Dalvik, and Internal Storage.
- Go back, click on Install, and select the Zip file in your memory card.
- Wait for the installation to complete. First boot takes a lot of time so let it happen. If it happens for more than 30 minutes then there may be an issue.
This is still Android 7.0 Nougat but it adds few features. The developers are trying to port Oreo ROM on this device. So do keep checking on XDA forums.
Rooting (SuperSU/Magisk) Moto X Force
We have successfully rooted Moto X Force using both SuperSU and Magisk with the above-mentioned ROM. They both work flawlessly. The Magisk works on both stock firmware and custom ROM as well. You can use any approach you like.
- Now to get Root Access using SuperSU download any Zip File from (http://bit.ly/2H54fad) here and put it in your memory card again. We used a file ending with the name v2.82 SR5.
- Again open custom recovery click on Install and select the Root file (zip file).
- The installation will take some time and while opening your phone again it might reboot a few times and may take a longer period so let it happen.
- If there is no SuperSU in your phone then download it from the Play Store and you must see root access.
- If you want to use Magisk then just flash the file in the clean installed ROM.
- Download the Latest Magisk file and put it in the SD card.
- Open TWRP click on Install and flash the zip.
Flashing Stock Recovery on Moto X Force
This is to return your phone to its original state with stock software or ROM. Some people may not like custom ROM or want to re-lock the Bootloader again. Also, it is for rescue purposes because sometimes experiments like flashing don’t go as intended. We also tried to install Magisk and we got a Soft Brick thus we learned this process. The TWRP kept showing “No OS Installed” and kept looping back to the recovery. Our backup restore was also not working so we flashed the stock firmware back again. Please follow the below-mentioned Moto X Stock recovery flashing procedure.
- Download the stock firmware version fit for your XT1580. We recommend using UK firmware from XDA Thread.
- Extract all the files inside the compressed file and copy them to your platform-tools folder.
- Download mFastboot and extract the content to your platform-tools folder.
- Now open adb put your phone in fastboot mode test the device connection using command fastboot devices and use the below-mentioned commands serially. Make sure there are below-mentioned files in the zip files.
mfastboot flash bootloader bootloader.imgmfastboot flash boot boot.imgmfastboot flash recovery recovery.imgmfastboot flash system system.img_sparsechunk.0mfastboot flash system system.img_sparsechunk.1mfastboot flash system system.img_sparsechunk.2mfastboot flash system system.img_sparsechunk.3mfastboot flash system system.img_sparsechunk.4mfastboot flash system system.img_sparsechunk.5mfastboot flash system system.img_sparsechunk.6mfastboot flash system system.img_sparsechunk.7mfastboot flash system system.img_sparsechunk.8mfastboot flash system system.img_sparsechunk.9mfastboot flash system system.img_sparsechunk.10mfastboot flash system system.img_sparsechunk.11mfastboot flash modem NON-HLOS.binmfastboot erase modemst1mfastboot erase modemst2mfastboot flash bluetooth BTFM.binmfastboot flash fsg fsg.mbnmfastboot erase cachemfastboot erase userdatamfastboot erase customizemfastboot oem fb_mode_clearmfastboot reboot
5. If the Sparcechunk files in your zip is larger then also add them before going to the NON-HLOS.bin line. Now you can get your phone to sock software again.
Conclusion
So this is our extraction of research on Moto X Force XT1580 software modding and development. We hope this helps you because we have tried to collect and present every possible thing required by users. If any broken link or file is missing then do tell us. Also, it is good to learn the process of fixing broken Android drivers because it comes in very handy.
Also if you have any good custom ROM then suggest to us and also tell us about Came 2 API on Moto X Force. When we enabled Camera 2 API by editing build.prop in Moto X Force, neither the modified Google Camera, Camera FV-5 nor the stock camera app worked. We are working on this and we also expect help from you guys. Tell us anything if there is anything to add or update. Thanks to all the developers and contributors for their hard work on making Moto X Force better.